
Transistor Checker
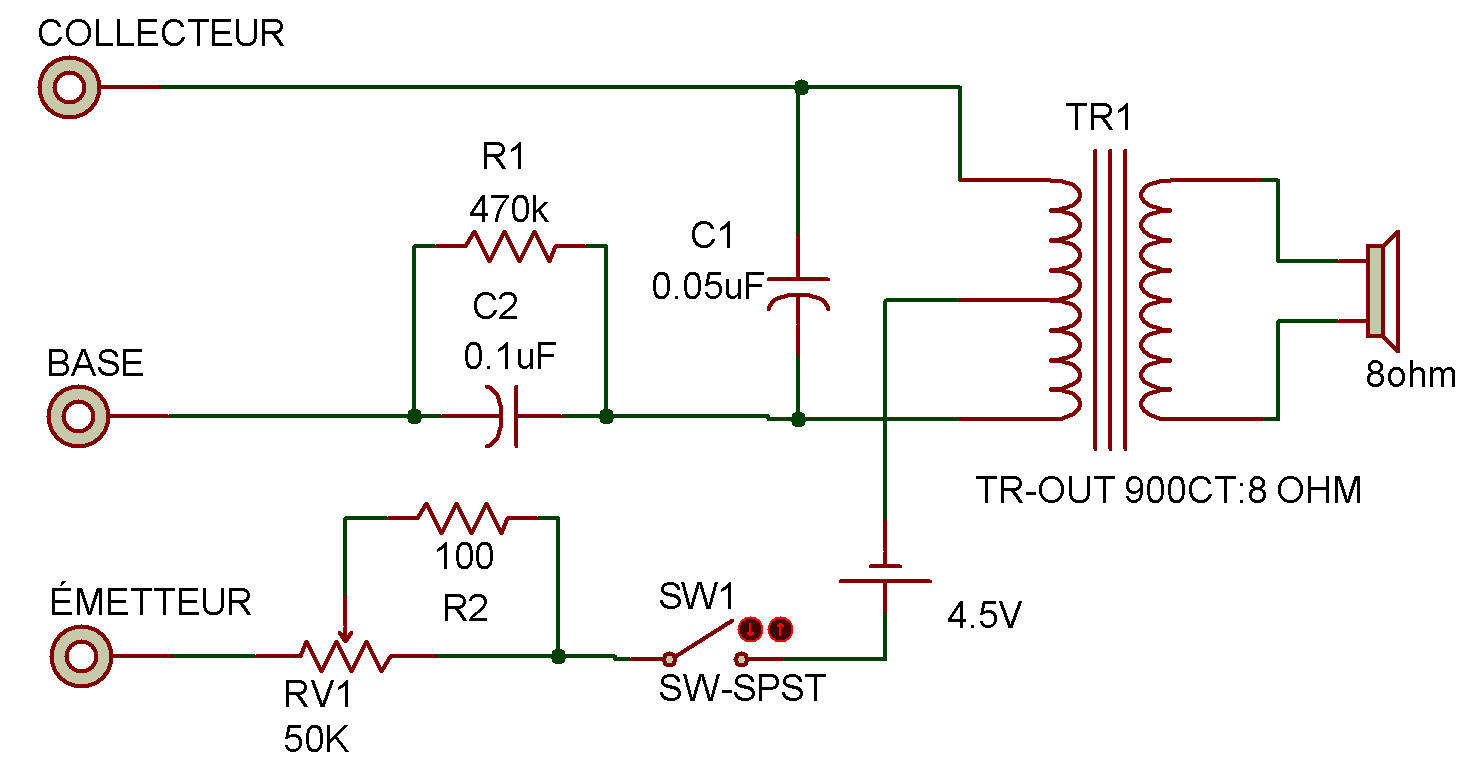
This project is the construction and testing of a very practical Transistor checker. With an aural signal you can check any Transistor for (1) short circuits, (2) open circuits and (3) relative gain.
The procedure to test a Transistor is as follows:
1. Hook up the circuit for the type Transistor to be checked (PNP or NPN).
2. Connect the leads to the Transistor properly.
3. Place the Control on minimum (full CCW).
4. Close the Key and advance the Control until oscillations begin.
You interpret the results as follows:
a. High-gain Transistors oscillate on lower Control settings than low-gain types.
b. Power Transistors require higher Control settings than small-signal Transistors.
c. Transistors which are open or shorted will not oscillate.
d. Transistors of the wrong type for the circuit setup (PNP or NPN) will not oscillate.
e. Transistors connected improperly will not oscillate or may require very high Control settings.
f. Transistors which are leaky but still have proper gain will oscillate much like a good Transistor.
Check for leakage with a high-resistance ohmmeter. The circuit is a straight-forward audio oscillator, but with a feedback control in the emitter lead. The feedback operates by inserting resistance into the circuit to cause both degenerative feedback and decreased Transistor electrode voltages.
The only change between PNP and NPN checks is the reversal of the Battery connections. This is required because Transistor bias voltage must always cause current flow gains the arrow head symbol in the emitter of the Schematic symbol.
The PNP Transistor symbol has the arrow head pointing away from the emitter lead, therefore, both base and collector currents must flow toward the emitter inside the Transistor.
The NPN Transistor symbol has the arrow head pointing toward the emitter lead, therefore, both base and collector currents must flow from the emitter to the base and collector inside the Transistor.
Use this tester to check each Transistor in this kit and record the control dial setting below for comparison later on when troubleshooting for a suspected bad Transistor.
2SA (upper) _________ , 2SA (lower) ________ , 2SC _________
![]()