Zener voltage checker
If you wish to review the zener voltage, go back to the last project Basic operation of zener diode.
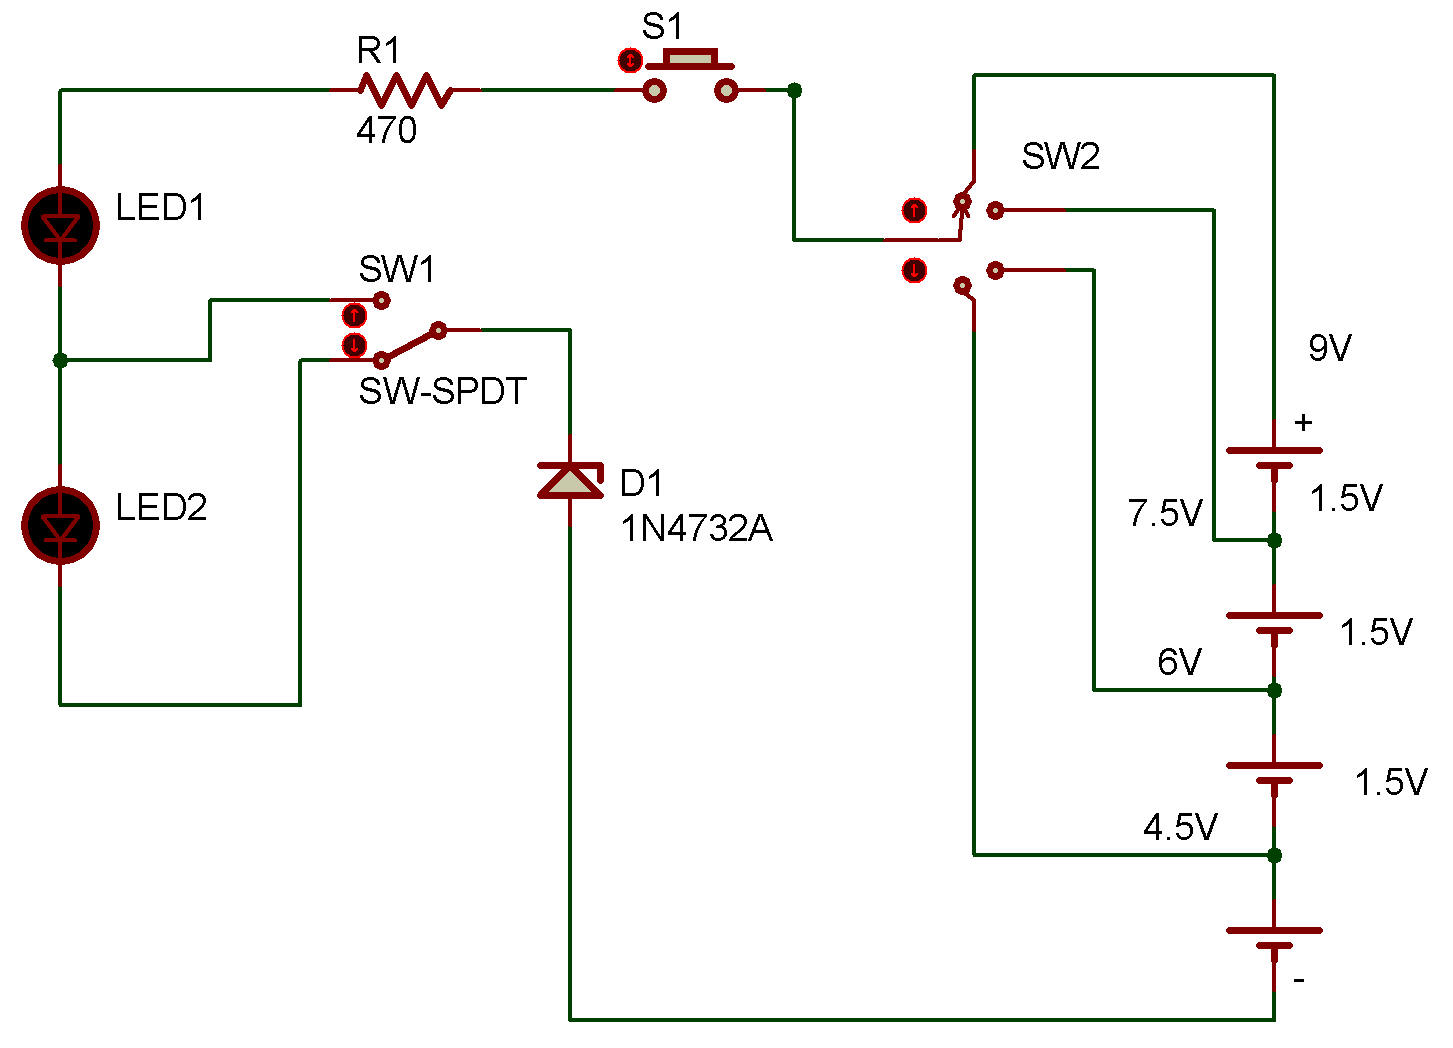
In this project, you are going to decrease the voltage to the zener diode check circuit from 9V to 4.5V in steps of 1.5V and check the zener voltage of the zener diode D1 by looking at LEDs.
LEDs and a current limiting resistor R1 are placed in series between the power supply and the cathode of D1. You can check the zener voltage by looking at the LEDs.
As you can guess, the LEDs light only if the supply voltage is higher than the zener voltage; in the other case, the LEDs go out.
When you've wired the product, place the select switch to the up position. Set the switch S1 to ON. You see LED 1 and LED 2 light brightly.
Then, change from 9V over to 7.5V. You see LED 1 and LED 2 still lit, although slightly darker.
Now, place the select switch to the down position, change from 7.5V over to 6V, and then set S1 back to ON. LED 2 should go out, with LED 1 lit brightly.
Finally, change from 6V over to 4.5V. LED 1 and LED 2 should go out, or LED 1 alone should be dim. You can see from these operations that the zener diode of D1 is above 4.5 V and below 6 V.
(This explanation neglects the voltage drop of LED. It will be 1.5 V or so.)

![]()